How to Scan Multiple Photos on a Flatbed


Starting in version 9.8.06, VueScan now has the ability to automatically crop and straighten photos. No more tedious manual adjustments or time-consuming edits – we’re about to make your scanning process faster and more efficient than ever before.
Using this feature is as simple as it gets. Just place your photos anywhere on the flatbed, hit the preview button, and watch as VueScan’s autocrop feature identifies and places crop boxes around your photos. If you see something that isn’t quite right, don’t worry! You can adjust the crop boxes as needed before you press scan. Once you’re happy with the layout, hit scan, and VueScan will take care of the rest, saving each photo in separate files for your convenience. Let’s dive into the step-by-step process in more detail.
1. Place photos on the flatbed
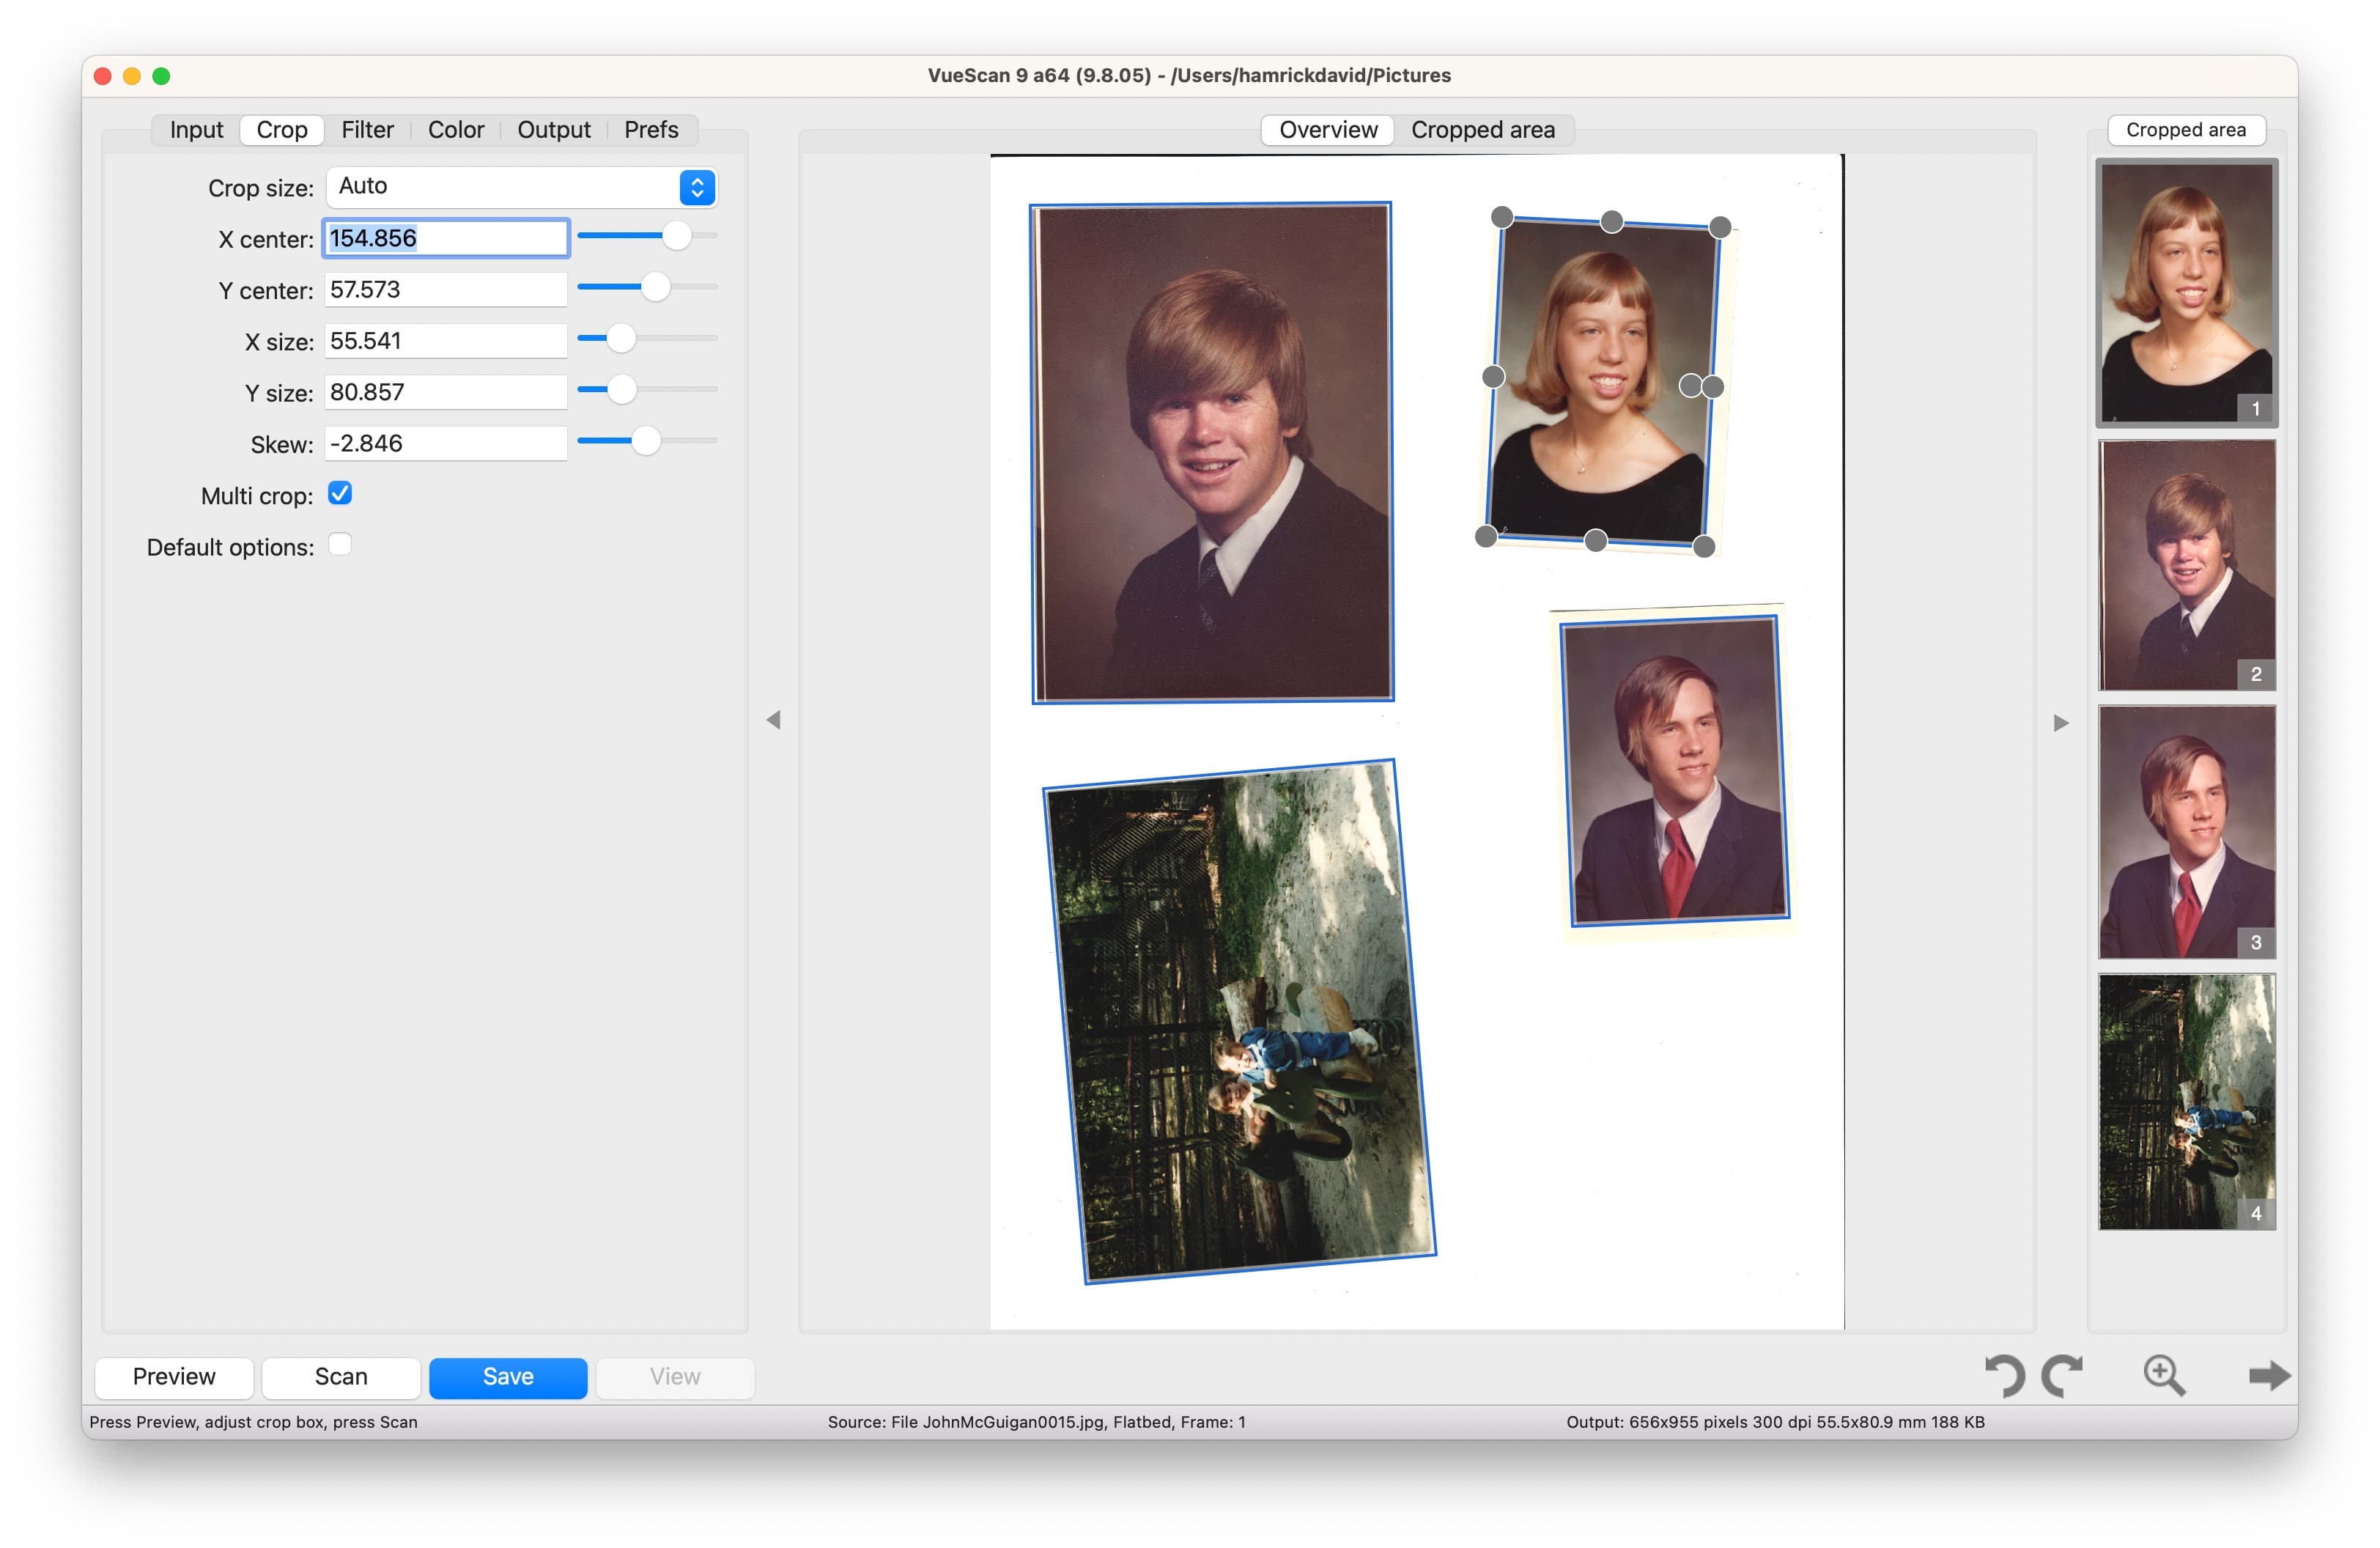
VueScan automatically cropping and rotating the 4 scanned photos
Place your photos on the flatbed. Make sure you leave some space in between the photos. If they’re too close together then we can’t recognize them as separate items. Also, make sure the photos aren’t overlapping with each other.
2. Set up the options in VueScan
These options should be on by default, but make sure Input | Autoskew is turned on and Crop | Multi crop is turned on. If you ever need to go back to the default settings you can select File | Default Options in the top menu bar.
3. Preview and adjust crop boxes
Press the Preview button and you’ll see your photos in the right hand Overview area. VueScan should automatically recognize each photo, but sometimes it will make a mistake. You can delete a crop box by pressing the Delete key.
You can adjust the width and height with the handles on the sides of the image. You can also draw a new box by clicking and dragging outside the bounds of a crop box.
You can adjust the rotation angle with the dot on the right hand side of the image.
4. Scan
Press the Scan button to scan and save the images you previewed. If you have JPEG selected as the file type, each image will be saved in its own JPEG file.
And there you have it! By following these simple steps, you can utilize the power of VueScan 9.8.06 to scan multiple photos on a flatbed. This automatic cropping and straightening feature not only saves you time, but also simplifies the scanning process, eliminating the need for manual adjustments and allowing for simple rotation corrections. We’re excited to see how these enhancements transform your photo scanning process. So go ahead, give it a try and let us know your thoughts.