How To Restore Faded Slides with VueScan

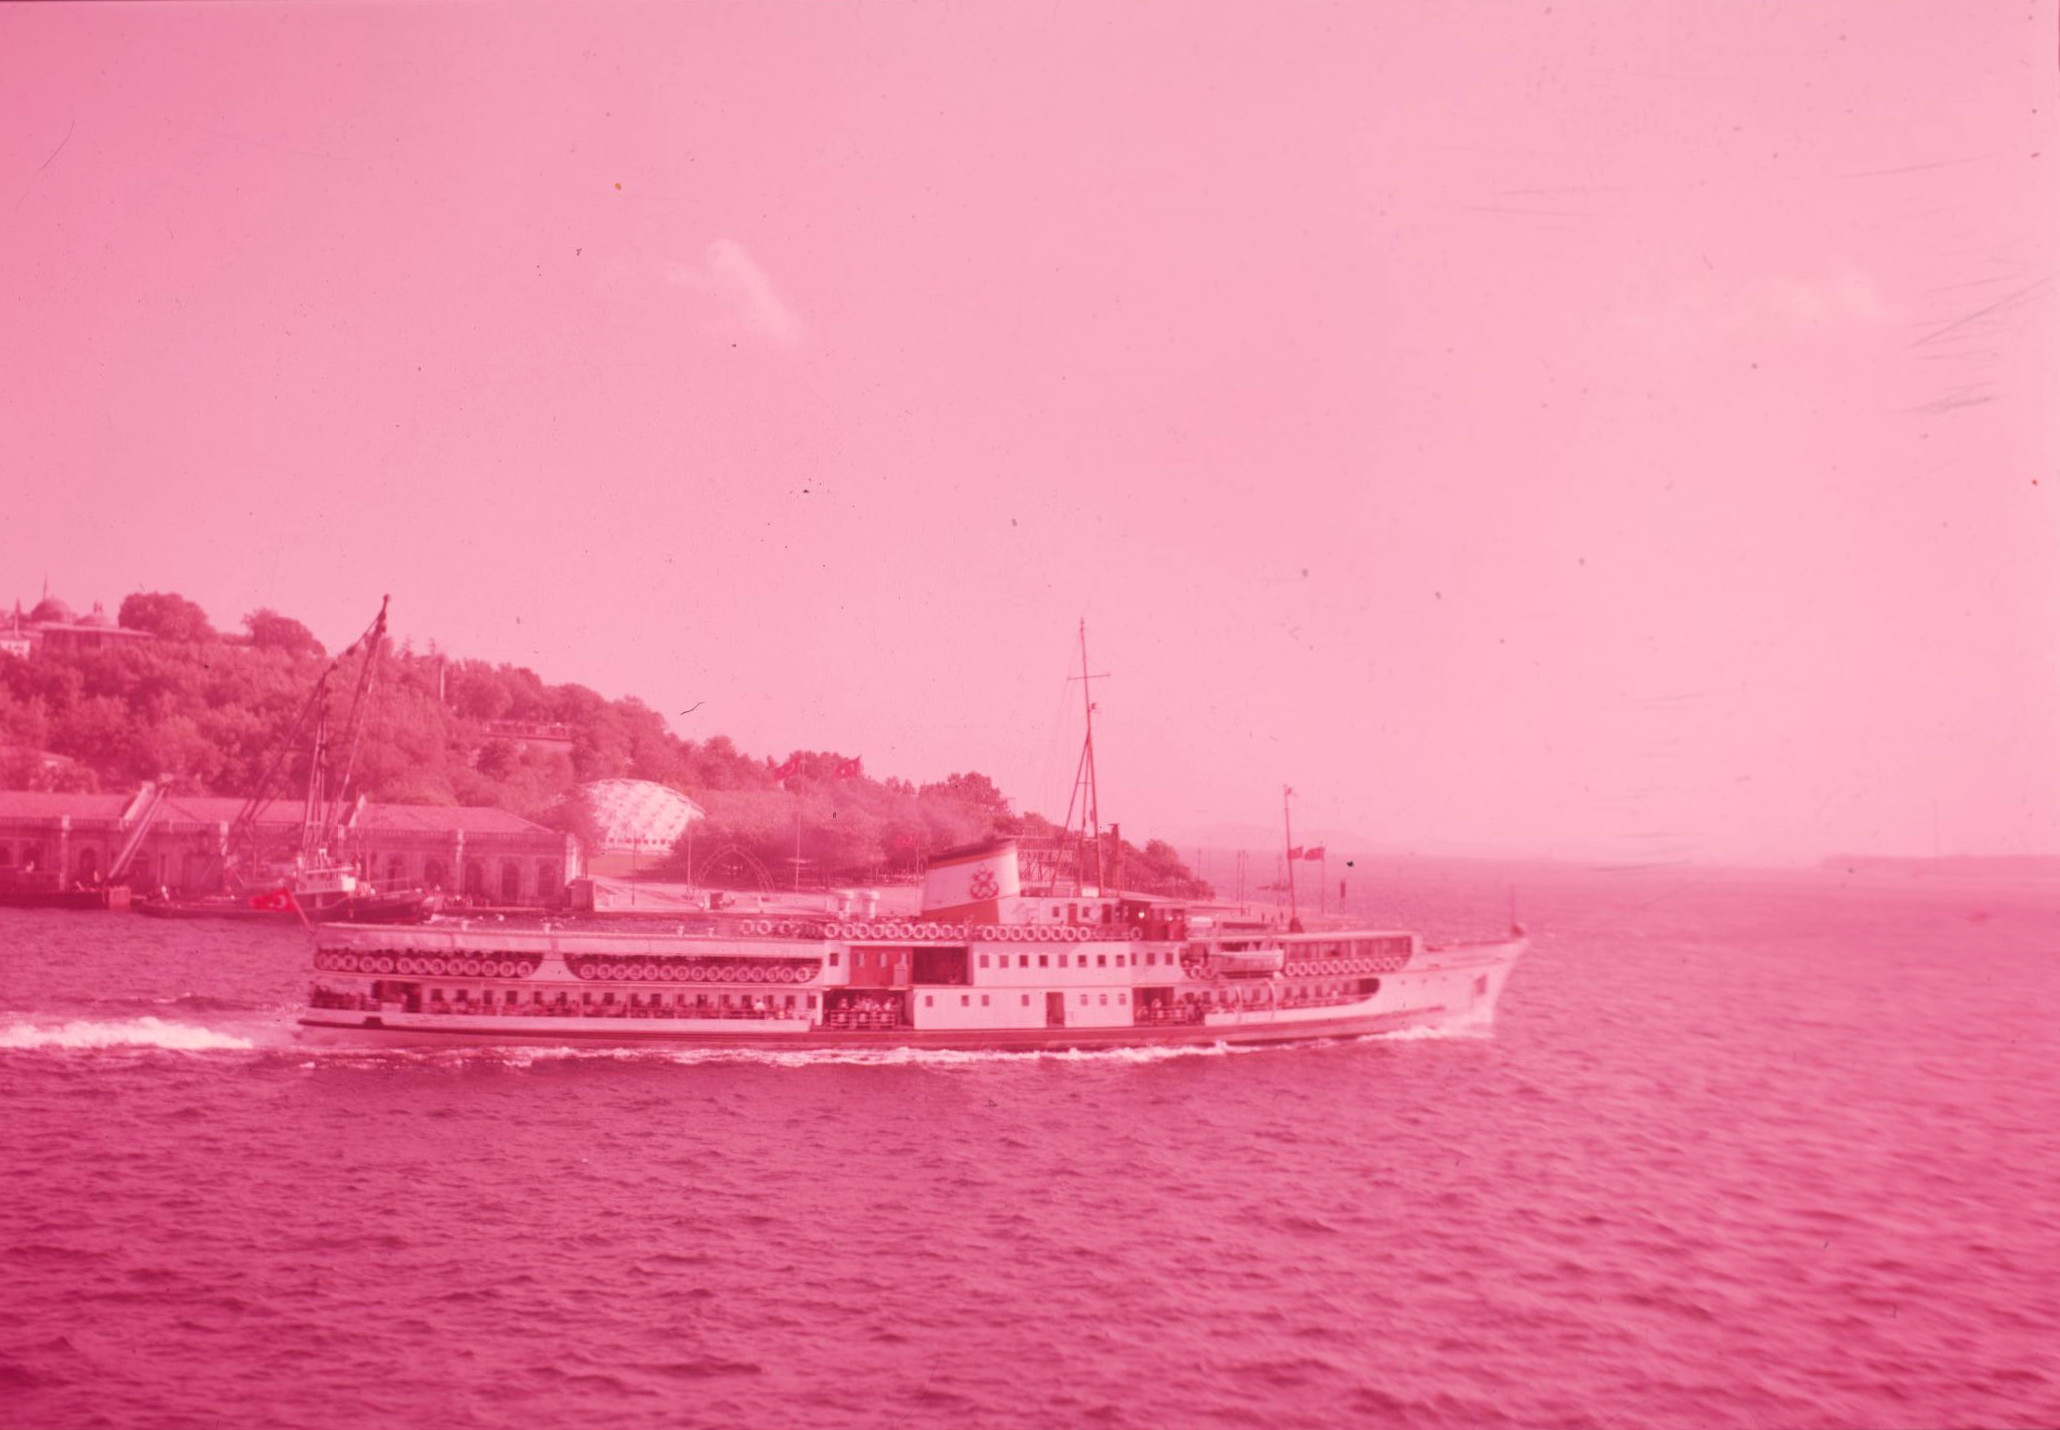
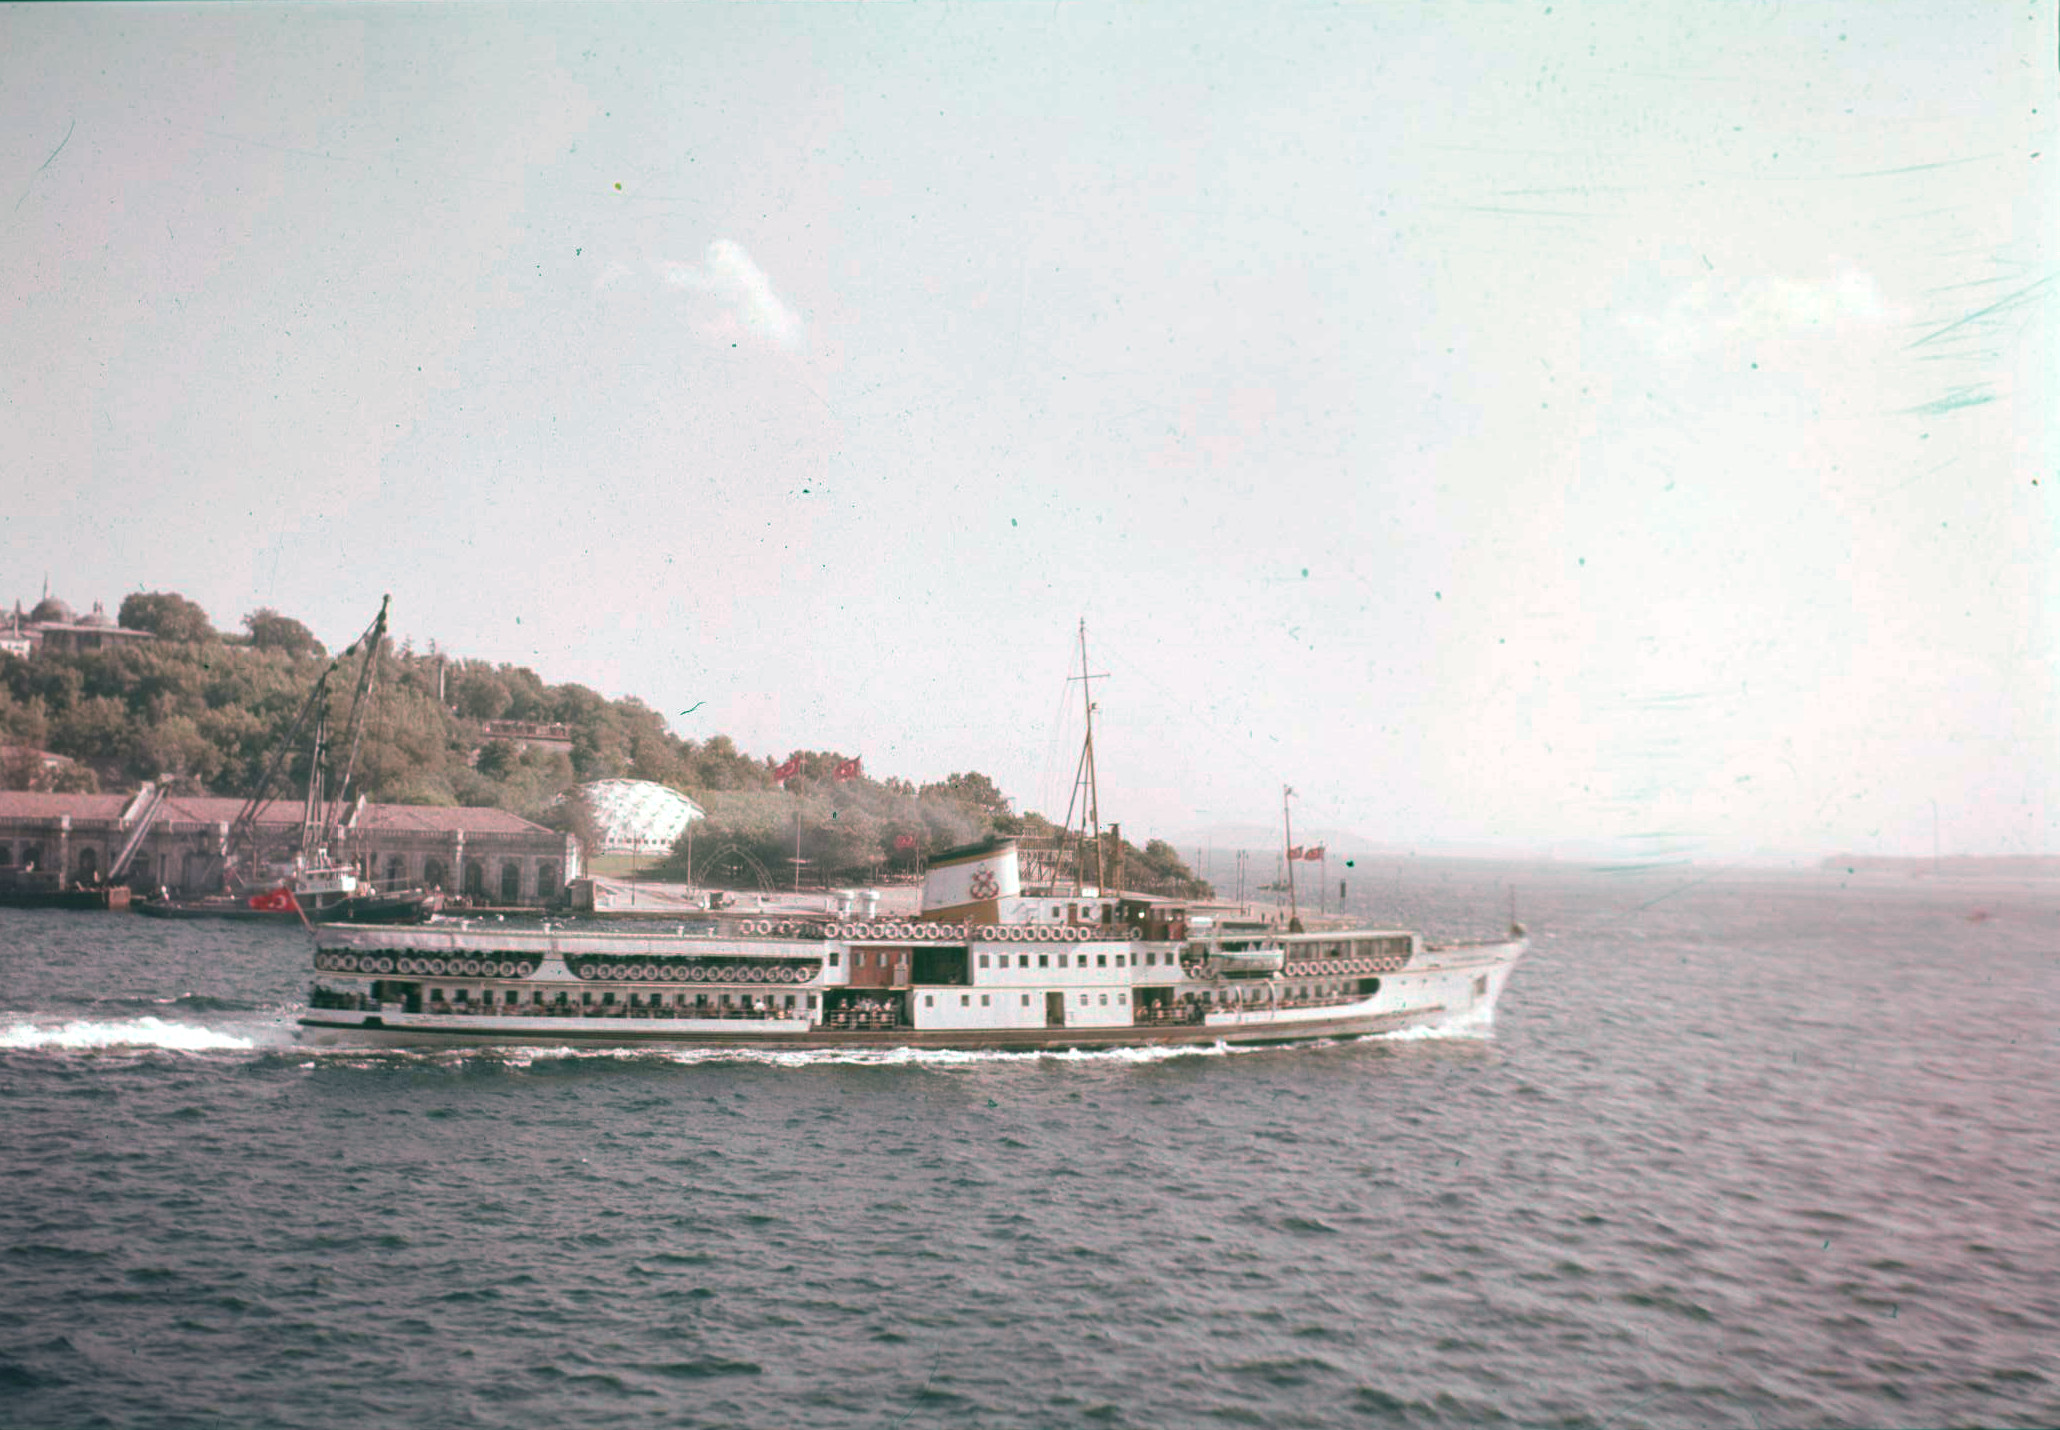
A scanned slide before and after fading correction performed by VueScan
We’ve all been there. You’re going through an old box of memories and you come across a stack of slides that you haven’t seen in years. You’re excited to relive those moments, but as you hold the slides up to the light, you realize that the colors have faded and the images aren’t as vibrant as you remember. It’s a shame, but don’t worry, there’s a solution! With the help of a powerful tool like VueScan, you can restore those faded slides to their former glory. In this article, we’ll be talking about the common causes of fading in slides, the challenges of restoring them, and how VueScan Scanner Software can make it easy for you to bring your old memories back to life.
Exposure to light and heat can cause the dyes in the film to deteriorate over time, resulting in faded colors and washed out images. Age is also a factor, as slides that have been stored for many years may have naturally degraded. Additionally, certain types of slide film are known to have a shorter lifespan and are more prone to fading like Ektachrome and Agfa.
Restoring faded slides can be a difficult task, but with the help of VueScan Scanner Software, it is possible to restore the original colors and bring back the memories. This powerful tool is specifically designed to restore faded slides and bring back their original colors. With advanced color correction algorithms, VueScan can automatically detect and fix fading, color casts, and other problems that make slides appear faded. Not only that, but VueScan makes it super easy to digitize your slides and archive them for preservation and ease of viewing. So, not only will you be able to see your old memories in all their restored glory, but you’ll also be able to share them with friends and family in a convenient way.
How to use VueScan to Restore Faded Slides
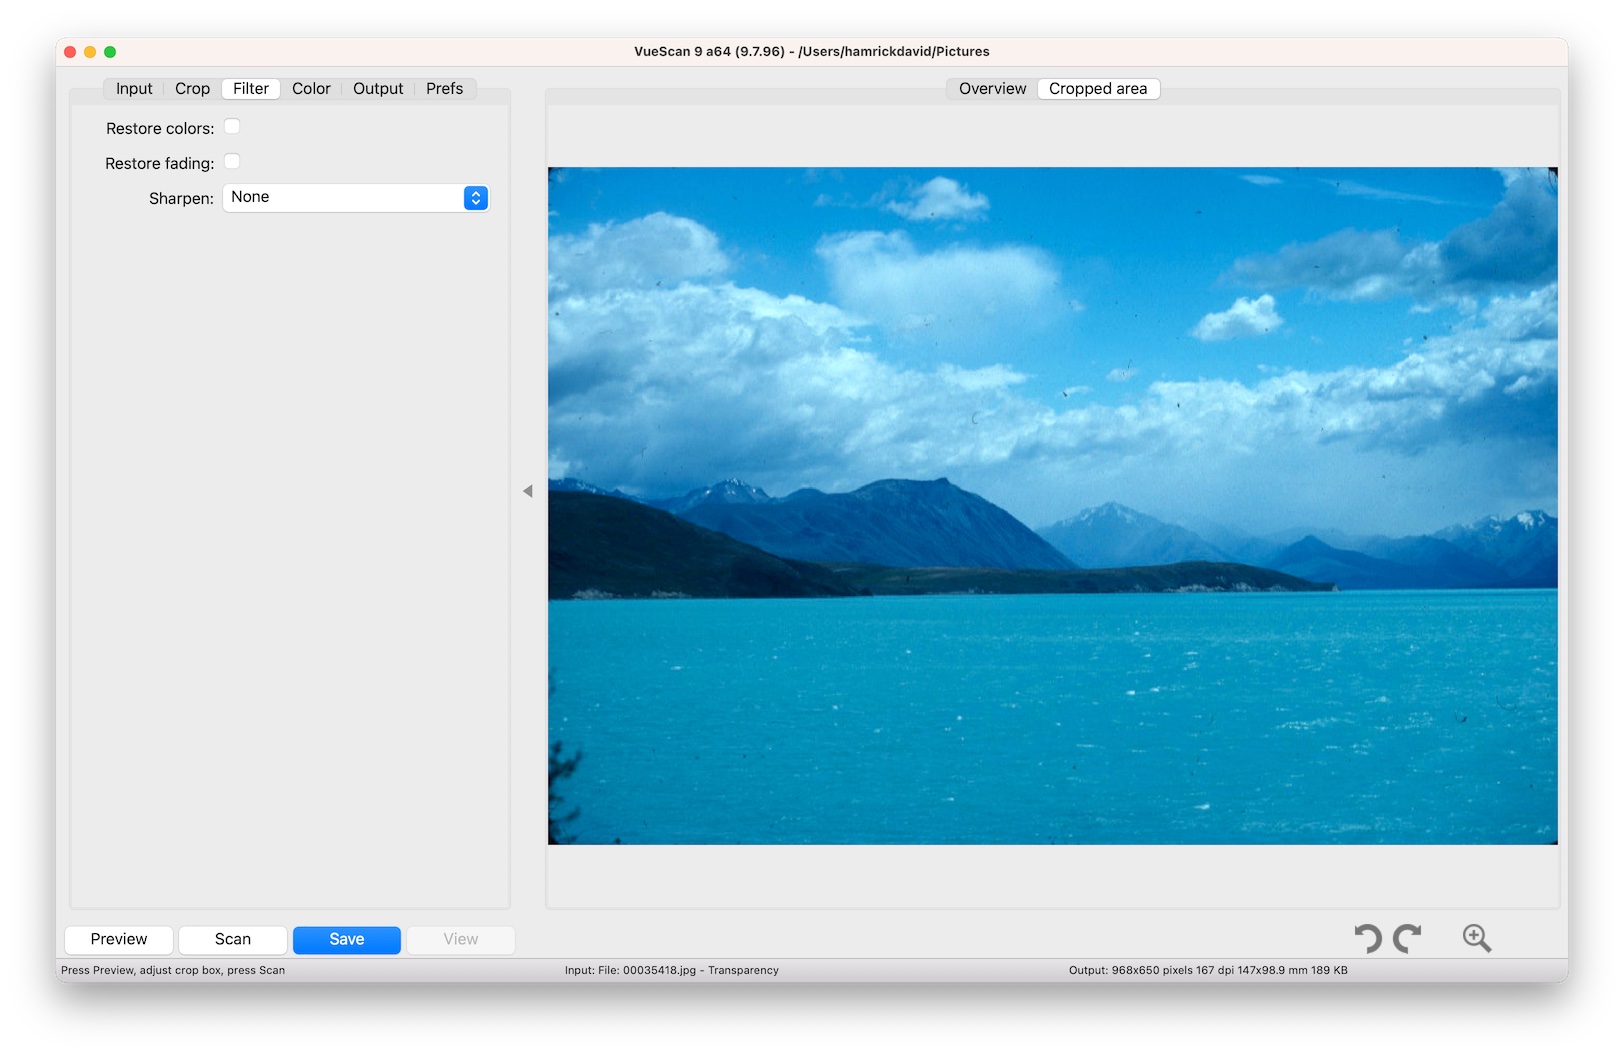
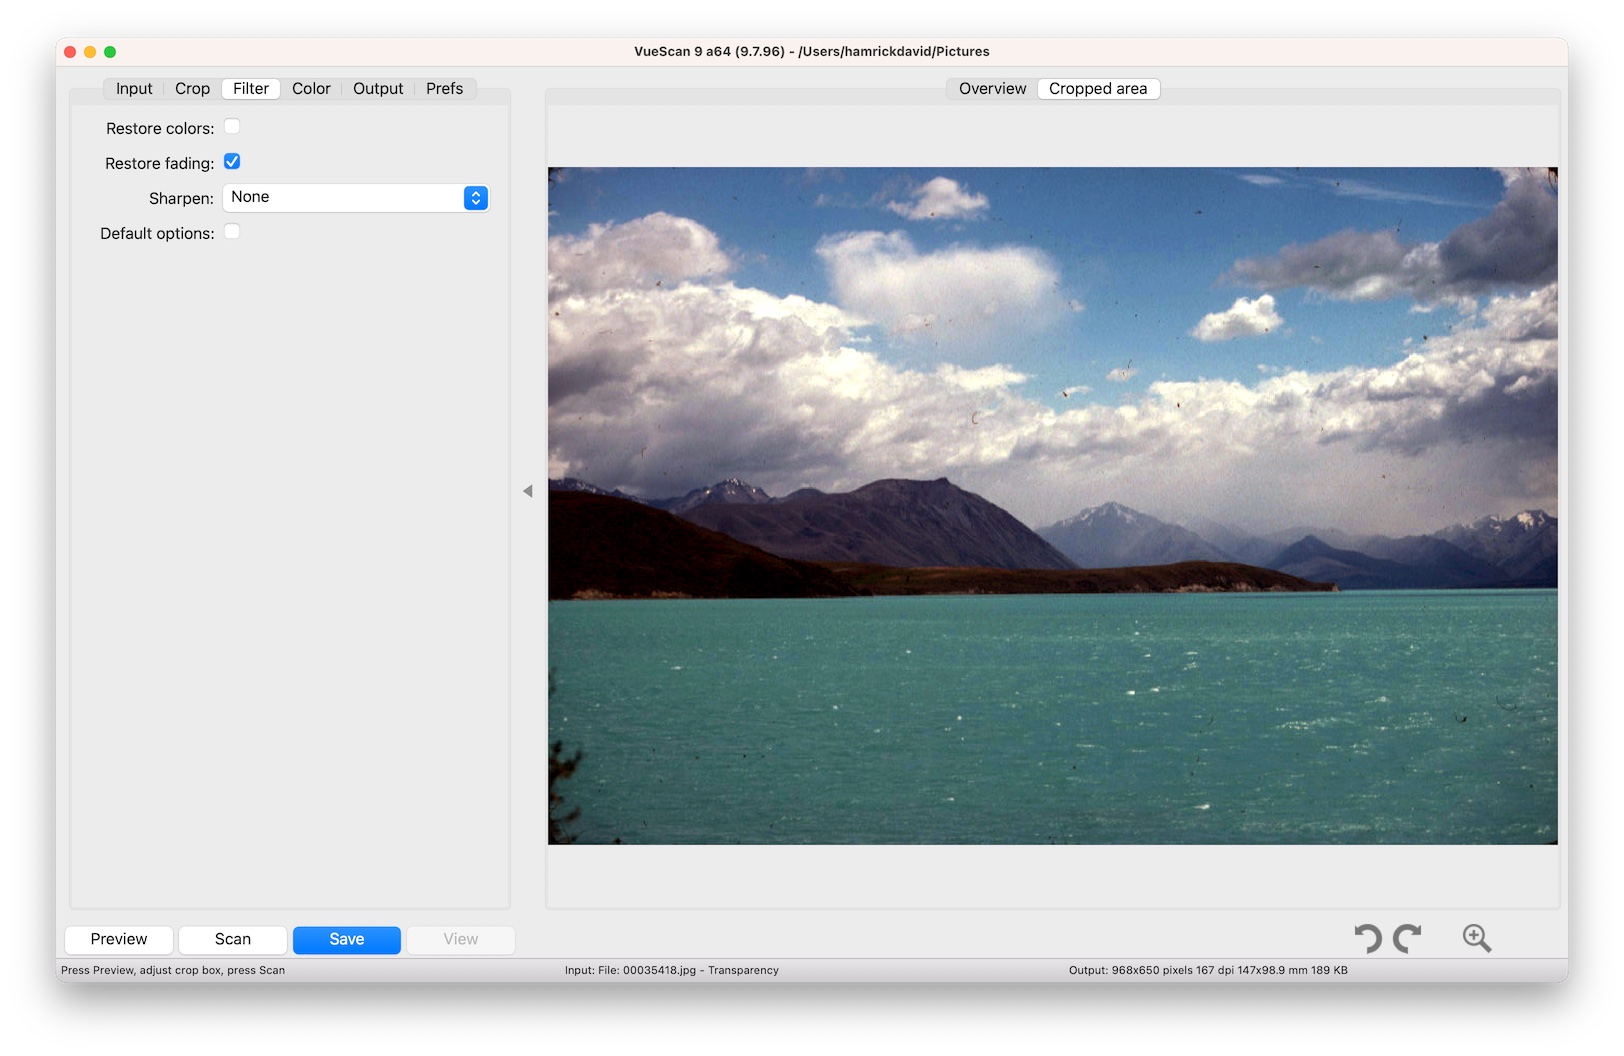
A screenshot of VueScan showing a blue casted scanned slide before and after fading correction
Using VueScan Scanner Software to restore faded slides is a simple process that can be done by anyone. Here is a step-by-step guide on how to use the software:
-
Download and install VueScan on your computer.
-
Connect your scanner to your computer and open VueScan.
-
Select
Slide Filmas theInput | Mediaoption. -
Press the
Previewbutton in the lower left hand corner. -
In the
Filtertab, selectRestore Fading. You’ll now see the fading removed from your Preview -
Press
Scanto do a final scan of what you previewed. -
Repeat the process for as many scans as you have.
Preserving old slides is important for maintaining memories and history, but it can be a challenge when slides start to fade. The problem with faded slides is a common one, but with the help of advanced technology like VueScan Scanner Software, restoring faded slides to their original colors is possible.
VueScan Scanner Software is an easy to use and powerful tool that can automatically fix fading, color casts, and other problems that make slides appear faded. With its advanced color correction algorithms it makes preserving and viewing old memories easy and convenient.
We’ve shown you how to use VueScan Scanner Software to restore faded slides. We hope that it has helped you to understand how to use VueScan and inspired you to restore your own faded slides.