Crop Tab
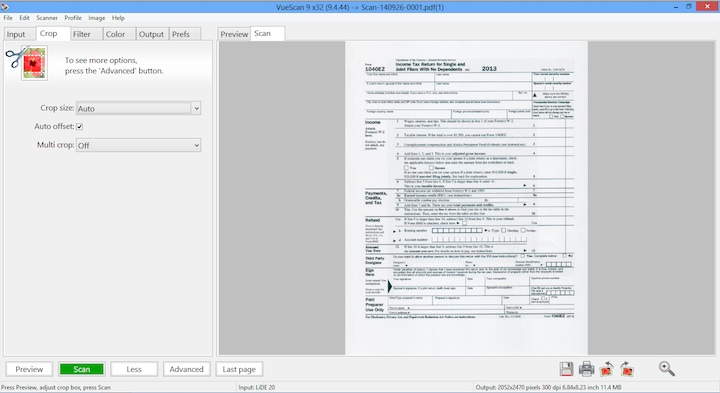
The crop tab lets you specify full automatic cropping, full manual cropping and a range of options between. Note that VueScan also lets you change these values by using the mouse on the preview image.
The crop area is displayed as a blue line with circles as crop handles that defines the area for subsequent VueScan operations. Position the mouse over the blinking line and drag to reposition any edge. Hold down the shift key and click and drag anywhere within the crop area to reposition the entire crop area (or drag the center of the crop area with the mouse). Click the scan tab for VueScan to display the result of the cropping automatically. The scan tab will use the data from the preview if a full scan has not yet been performed.
You can nudge the crop box by one pixel up, down, left and right by selecting a crop box and pressing one of the arrow keys. You can nudge by 10 pixels by holding down the shift key while pressing an arrow key. You can nudge the skew of the crop box by 0.05 degrees by holding down the Control key while pressing the up arrow key or the down arrow key.
The area included in the crop is important in two ways. First, this is the area of the scan that will be included in the output files. Second, this area is used to calculate color balance, histogram, and other settings.
Be sure not to include the border around the edge of an image as part of the crop as this may cause these settings to be calculated incorrectly. Crop | Buffer (%) can also be used to prevent inadvertent inclusion of data outside of the desired frame in color settings.)
- Crop | Crop size
- Crop | All frames
- Crop | X/Y center
- Crop | X/Y size
- Crop | Skew
- Crop | Multi crop
- Crop | Lock aspect ratio
- Crop | Aspect ratio
- Crop | Border (%)
- Crop | Buffer (%)
- Crop | Focus X/Y offset
Crop | Crop size
This option specifies the method used to determine the size of the cropped image:
Manual
Lets you enter all of the crop sizes manually. This option will also be selected if you have adjusted the crop size or position using the mouse on the preview window.
Maximum
Uses the maximum size possible.
Auto
Analyzes the image find the crop boxes automatically.
Standard Option: This option is always displayed.
Crop | All frames
Setting this option makes all other frames with Manual crop size match the manual crop size and skew of the current frame.
Professional Option: This option is displayed when Crop | Crop size is set to “Manual”, when Crop | Multi crop is turned off and when there are multiple frames.
Crop | X/Y center
This is the offset in the preview area to the center of the crop box.
These positions are relative to the upper left-hand corner of the preview area. See Input | Preview area.
Standard Option: This option is displayed when Crop | Crop size is set to “Manual”.
Crop | X/Y size
This is the size of the image area that you are cropping. If set to zero, the entire scanned area will be used.
Standard Option: This option is displayed when Crop | Crop size is set to “Manual”.
Crop | Skew
Use this option to rotate the image by a small angle to correct for images that aren’t quite straight. The angle is specified in degrees, plus or minus 45 degrees.
Standard Option: This option is displayed when Crop | Crop size is set to “Manual”.
Crop | Multi crop
If this option is set, multiple crop boxes will be automatically found if a preview contains multiple images.
Standard Option: This option is always displayed.
Crop | Lock aspect ratio
This option forces the crop box to keep a constant aspect ratio while one (or two) edges are being dragged by the mouse.
This ratio is always greater than one, and is the ratio of the longest edge to the shortest edge of the crop box.
If set to “Off”, the aspect ratio isn’t locked.
If set to “Image size”, the aspect ratio is computed using the Output | Printed size option.
If set to “Manual”, the Crop | Aspect ratio option will appear and you can manually set the aspect ratio of the crop box.
Professional Option: This option is always displayed.
Crop | Aspect ratio
If Crop | Lock aspect ratio is set to “Manual”, use this option to manually set the ratio of the longest edge to the shortest edge of the crop box. For instance, if you plan on printing an image on 4x6 paper, the aspect ratio should be 1.5 (6 divided by 4).
Professional Option: This option is displayed when Crop | Lock aspect ratio is set to “Manual”.
Crop | Border (%)
This instructs VueScan to enlarge the image beyond the edge of the crop box. This added border is ignored when computing the color balance of the image.
This option is useful for adjusting the size or position of the crop box that may have cut off parts of the image you want to keep. Because border will extend the effective area that is cropped, it will tend to include areas of white (or black) in the resulting image; if these parts of the image were not ignored when computing color balance, they could skew the results.
Border is a percentage relative to the dimensions of the cropped area, up to the maximum size of the preview area.
Border can also be set as a negative value in order to reduce the size of the image.
Compare this option to Crop | Buffer (%).
Professional Option: This option is always displayed.
Crop | Buffer (%)
This causes VueScan to ignore some image data just inside the edge of the crop box of the image when computing the color balance of the image. Unlike Crop | Border (%), the buffer does not affect the size of the image.
This option is useful to account for sizing or positioning errors of the crop box that incorrectly include parts of the image from its outer edges. These white or black areas can significantly skew the calculation of color balance if not ignored.
Buffer is a percentage relative to the dimensions of the image area. Because it includes a Crop | Border (%) it should always be set slightly higher than Border.
Compare this option to Crop | Border (%).
Professional Option: This option is always displayed.
Crop | Focus X/Y offset
This option determines where the auto focus is centered. This position is displayed on the preview as a small circle containing the word ‘Focus’.
Film tends to curl along its length, as well as across its width in which case the focus will be slightly off as the edges of the film will be closer to the lens than the center.
To minimize this effect, position the focus point between the center of the film and its edge in both dimensions, or slightly closer to the edge to account for less depth-of-field the closer to the lens.
Professional Option: This option is displayed when the scanner is capable of focusing.