PDF Thumbnails in VueScan
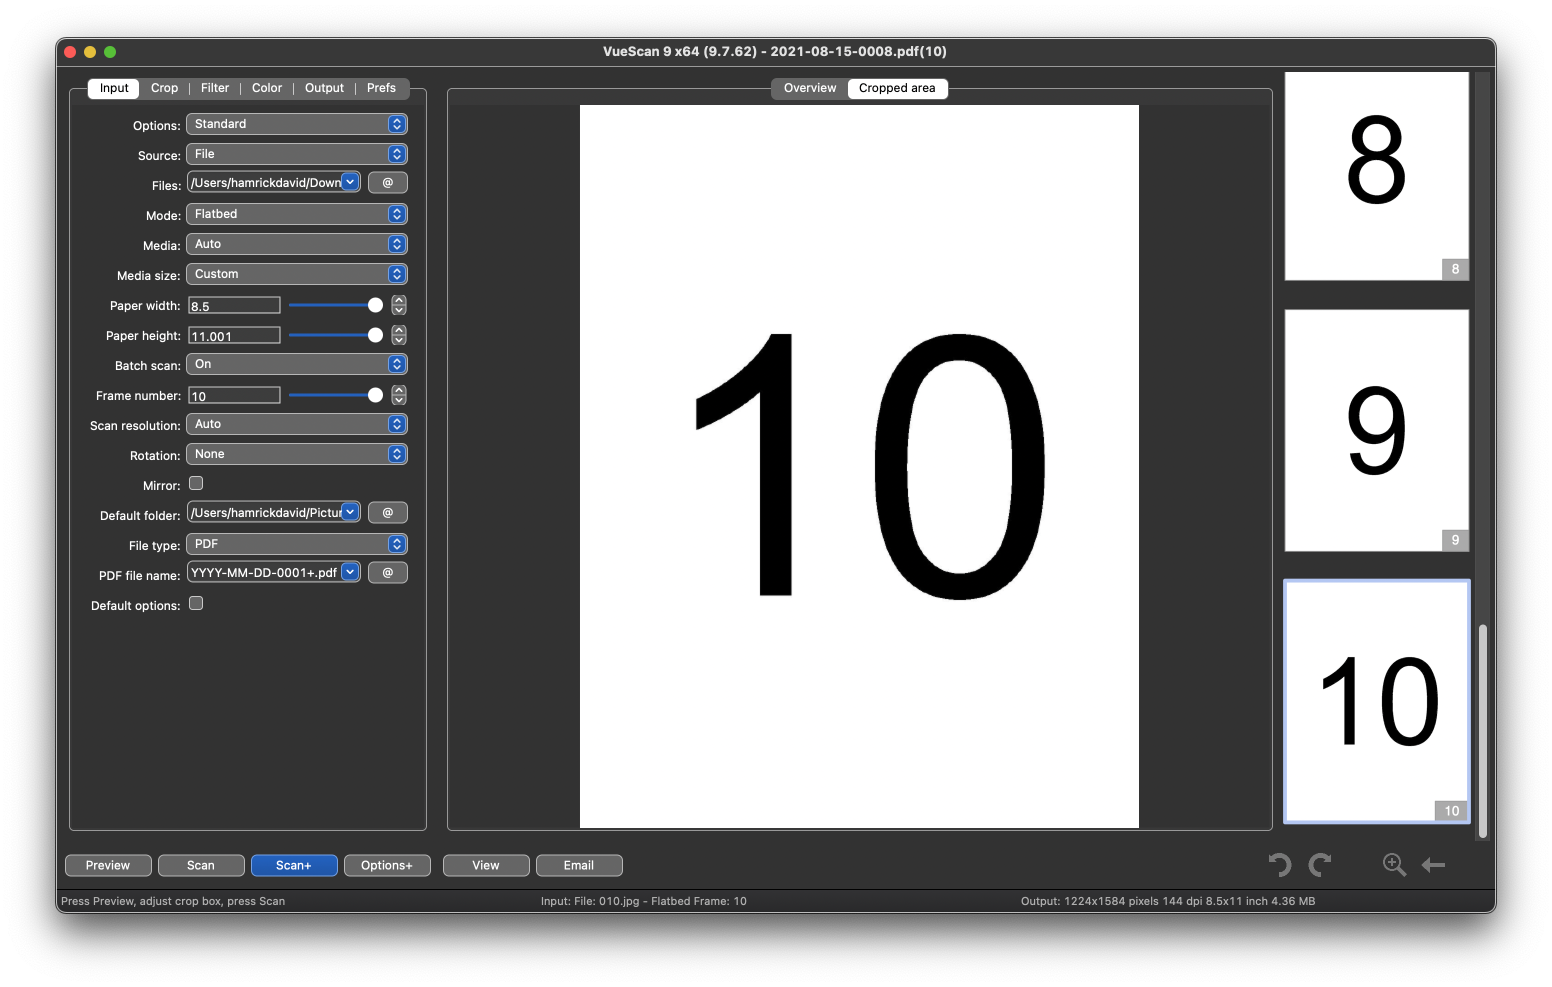
We’ve got a big update for you today in VueScan 9.7.63. Multipage PDF Thumbnails! VueScan has been able to scan multipage PDFs for years. But after you scanned another page, you couldn’t view or manipulate the previous pages you had scanned without going to an external editor.

With today’s update, you can now visually see what you’re working with, and make changes and corrections as you go. This has been a big customer request and we’re excited to hear about how people are using it to scan more efficiently.
See the document as you work on it
Now when you scan to a PDF, you can see the pages of the document as thumbnails on the right hand side of the screen. Want to scan more pages? Just press the Scan+ button to add pages to the document you’ve already started. Want to start a new document? Just press the Scan button and it will start a whole new PDF.
Rearrange Pages
Let’s say there was a document in the wrong position when you scanned 50 pages. You no longer have to reach for an external image editor (like Preview on the mac) or scan the whole document again. Now you can just click the thumbnail and drag it to the position you want it. Changes you make will be near instantly reflected in the PDF you have saved. So if you quit VueScan you don’t need to explicitly save changes.
Delete Pages
Accidentally scanned a page you don’t want to include? No problem! Just right click on a thumbnails and select Delete. VueScan will just remove the page selected. It also can do this without rewriting the whole file so it’s a very fast operation.
Bulk operations
VueScan supports a number of operations that help manipulating large documents faster. Do you have a single-sided document feeder but need to scan a double sided document? Use your document feeder to scan all of the front pages, then all of the back pages, right click on the thumbnails and use the Interleave command to merge them in the correct order. You can also use the Separate command to reverse the effect. Or use the Swap even/odd command if you got your fronts and backs in the wrong order. Did you scan your pages in the reverse order? Use the Reverse command to correct it.
VueScan can also scan to an existing PDF. So if you accidentally press Scan instead of Scan+ and start a new document, you can go back to the previous document you were working on just by setting the Output | PDF file name to the previous PDF you had been scanning. The right hand thumbnail area should update with the thumbnails of the PDF you were scanning. You can also use it to append to PDFs that were generated by external programs. Let’s say you had a contract to sign and you just want to scan the signature page. Set the Output | PDF file name to the contract PDF file and just press Scan+ to scan and append the signature page.
PDF is the most popular document scanning format, but you might also want to scan multipage TIFF or JPG. VueScan can do the same thumbnail handling for either of those. JPG doesn’t have the concept of pages however, and so any additional pages you scan will show up underneath the page you scanned. This is useful if you want to scan the front and backside of something (like a driver’s license) and keep it all in the same JPG image.
VueScan started it’s life as a tool for film scanning. And for a long time the user interface in VueScan has been tied to that paradigm. But as film scanning becomes more of a specialist use, and document scanning continues to ascend, we want to make VueScan the best possible tool for all kinds of scanning. So whether you’re scanning documents, film/slides, photos, or more, VueScan has the tools to help you get the most out of your scanner.
This update is available today in version 9.7.63 (download here) and we hope you enjoy it!
