How to scan RAW files
If you’re scanning several images in one go, scan each image once and save the raw CCD data file. You can then re-process these scans in a variety of ways without having to scan the image again. This minimises film handling and is the fastest way to re-process all the scans if you want to try different options.
For batch scanning:
- Select File | Default options from the File menu.
- Set the options on the Input tab of the Options panel for the source and media you’re using
- Set Crop | Preview area to “Default”, Crop | Crop size to “Maximum”
- In the Output tab un-check all the options except for Output | Raw file
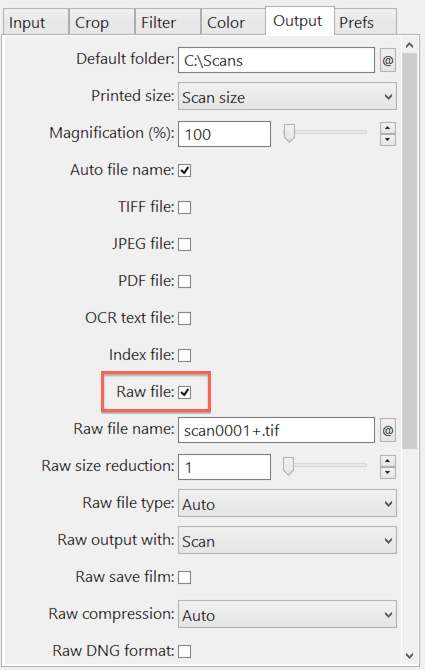
As each image is scanned, files with sequential numbering such as “scan0001.tif, scan0002.tif”, etc. will be created. You can change the folder and file names by changing the Output | Raw file name option.
To re-process these raw files:
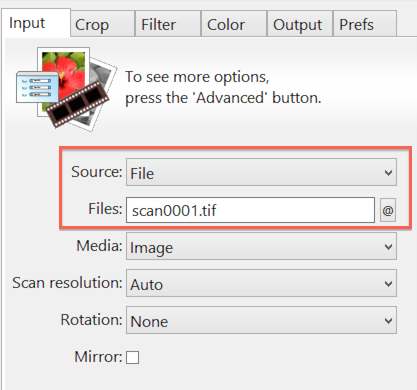
- Set the Input | Source option to “File”, and set Input | Files to point to the starting file in the series (eg scan0001.tif)
- Use the File | Default options command to set all the other options to their default values, then set up the other options as if you were scanning the images
- Set Input | Batch scan to “All” to scan all files, or set it to “List” and manually set the frame numbers. For instance, if you set this to 1-3,5,7, then scan0001.tif, scan0002.tif, scan0003.tif, scan0005.tif and scan0007.tif will be processed when you press the Scan button.
You may also want to follow the procedure in the Advanced Workflow Suggestions section of this Manual for locking the exposure and film base color for the entire roll of film. This will give the best quality scans.