Getting Started with VueScan
VueScan is a powerful scanning tool that’s aimed at helping you get the most out of your scanner and producing stunning results from your scanned photos.
It’s packed with loads of useful and powerful features and currently supports more than 4300 scanners from 35 scanner manufacturers on Windows, Mac OS X and Linux.
The following tutorial is designed to familiarise you with the software and its user interface, and to help you scan your first photos and slides.
You’ll find useful hints and tips here on how to carry out common tasks such as batch scanning and scanning to PDF files.
Getting to know VueScan
If you’ve used a scanner before, you’ve probably encountered something that looks a little similar to VueScan. But it’s still worth taking a little time to get used to where everything is before diving in.
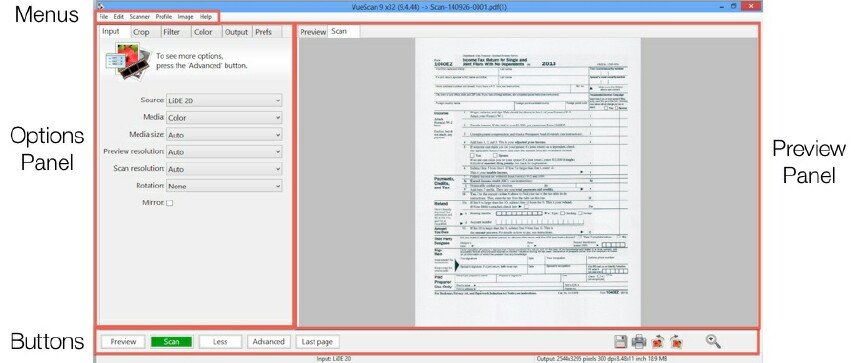
- The most important area is the Preview Panel. This is where your scanned document appears after it is scanned. You use this area to prepare your images before scanning them at full resolution.
- Settings are adjusted using the controls in the left hand panel. This is called the Options Panel. It has tabs running along the top. These are used to change the type of settings being adjusted.
- The Action Buttons are at the bottom of the window. Use these to scan, preview and carry out other essential tasks.
- The Menus at the top of the window can be used to access more advanced functions. These are described in more detail here.
Basic Workflow
You can do most things in VueScan by simply pressing the Scan button.
You can also see more options using Input | Options and you can choose additional options before pressing the Preview button or Scan button.
The basic process for scanning one image can be summed up in three simple steps (for an explanation of the more advanced functions, see the appendices in this manual):
Load your image
- Place your photo face down inside the scanner or load your slide/negative into your slide scanner
-
For photos, set Input | Media to “Color”
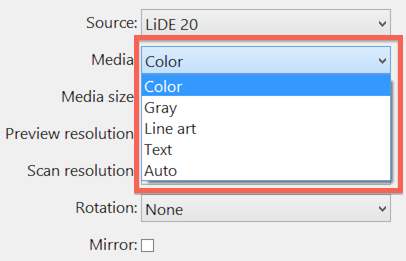
- For slides or negatives, set Input | Media to “Image”, “Color Negative” or “B&W negative”
Preview and crop
-
Click the Preview button. This produces a quick, low resolution snapshot for you to work on, before carrying out a full resolution scan
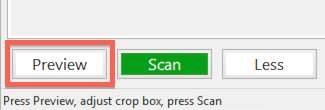
- When the preview has finished your image will be displayed in the Preview panel
- Click and drag the mouse to draw a box around the image. This ensures the scanner does not waste time scanning blank areas
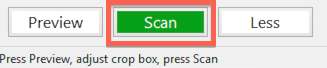
Scan and save
-
Click the Scan button
- Wait for the scan to finish. This varies depending on your scanner, the speed of your computer and the resolution you are scanning at
- Once the scan is complete it is automatically named and saved in the location specified by Output | Default folder
Reorder pages in multi page files
When you scan to a multi page file, a thumbnail of each page will be displayed on the right side of the window. You can reorder pages in multi page files with the mouse.