VueScan Newsletter - December 2017
Hello and welcome to the last newsletter of 2017!
Once again, thank you for your responses to last month’s newsletter, I received over 280 emails with your compliments, comments and suggestions. So please keep them coming, we read every email and the questions covered below are all requests from our customers.
It only leaves for us to say Happy Christmas and every best wish for yourselves and your family for 2018.
Looking forward to more scanning next year!
Since the last newsletter, we’ve released VueScan 9.5.93 and VueScan 9.5.94.
What's new in version 9.5.93
- Added support for Epson XP-6000
- Fixed problem with network-connected HP LaserJet MFP M278-M281
- Fixed problem with 1200 dpi scans with some LaserJet MFPs
- Fixed problem with some Brother scanners
- Fixed problem with Plustek OpticSlim 1180 on Mac OS X
- Fixed problem with Nikon LS-8000/LS-9000 focusing
- Under-the-hood improvements
- Updated Windows compiler to Visual Studio 2017
- Added drivers for Windows 10 ARM (untested)
- Updated Linux build to use Ubuntu 16.04 LTS
New feature in VueScan 9.5.94:
One of the most frequently requested features for VueScan is the capability to send a scan by email.
VueScan 9.5.94 now has the capability to email a scan after you’ve saved it to the hard drive. The file name of the most recent scan is displayed in the menu bar, and this is the file that’s emailed when you press the “Email” button (the same file that’s displayed when you press the “View” button).
You are then prompted to enter the email address to send to and the subject of the email. It’s a simple, clean way to email a scan.
VueScan’s new email feature requires the Professional Edition.
Frequently Asked Questions:
Q) How can I tell VueScan where to save my scans?
A) Click the “@” button next to “Output | Default folder”
Q) How can I make VueScan ask me for the file name of each scan?
A) Un-check the “Output | Auto file name” option
Q) What advantage does making multiple passes have?
A) The “Input | Number of passes”, “Input | Number of samples” and “Output | XXX size reduction” all do basically the same thing – they get multiple readings of the intensity at a given pixel position and output the average of these readings.
The theory is that the noise is reduced by the square root of the number of samples. To reduce the noise by a factor of two, you need to average four samples. For more information, see the “Noise power for sampled signals” in:
https://en.wikipedia.org/wiki/Signal_averaging
This is primarily useful when scanning the dark parts of slides. It’s not especially useful for scanning negatives or paper – these don’t have much noise in the dark areas.
Q) When should I calibrate my scanner?
A) There are two types of calibration that scanners use. The first of these is intensity calibration, to adjust for the fact that the lights don’t uniformly light up what you’re scanning. In flatbeds, this is done when needed by reading the white calibration target on the underside of the plastic where the scanner lamp goes before beginning the scan. In film scanners, there’s an area where the lamp moves to in order to get the lamp intensity (it’s a small rectangular area in the plastic film holder on flatbeds that have a lamp in the scanner lid). Some scanners will let you re-do the intensity calibration by using the “Scanner | Calibrate” command.
The second of these is color calibration, to adjust for the fact that the color response of the CCD/lamp combination is different for each scanner. This is what VueScan’s “Profile | Profile scanner” command does. It uses an IT8 color calibration target to get the color response of the CCD/lamp combination so that VueScan can produce scans in a known color space (usually sRGB).
Most scanners are already calibrated, but if your colors don’t look right, you might want to get an IT8 color calibration target to calibrate your scanner. A good source of these targets is: http://www.targets.coloraid.de/
Q) How many scanners do you support?
A) We currently support 4668 scanners on Mac OS X, Windows and Linux.
Customer Corner
VueScan in Use:
Tracking the Light is a daily blog produced by author Brian Solomon. It aims to illustrate photographic techniques, equipment and strategies relating to railway photography. Brian is the author of more than 60 books on railways and a monthly columnist for Trains Magazine.
In March 1984, I borrowed my father’s Rolleiflex Model T and exposed a roll of 120-size Ektachrome of Boston & Maine freights in the Connecticut River Valley.
The Rollei was an old camera and there was nothing electronic on it. Setting the camera was entirely up to the photographer. I was still in high school and my skills at using a hand-held light meter were less than perfect.
In short, the combined effect of snow on the ground and my lack of experience left me with some seriously underexposed medium format transparencies.
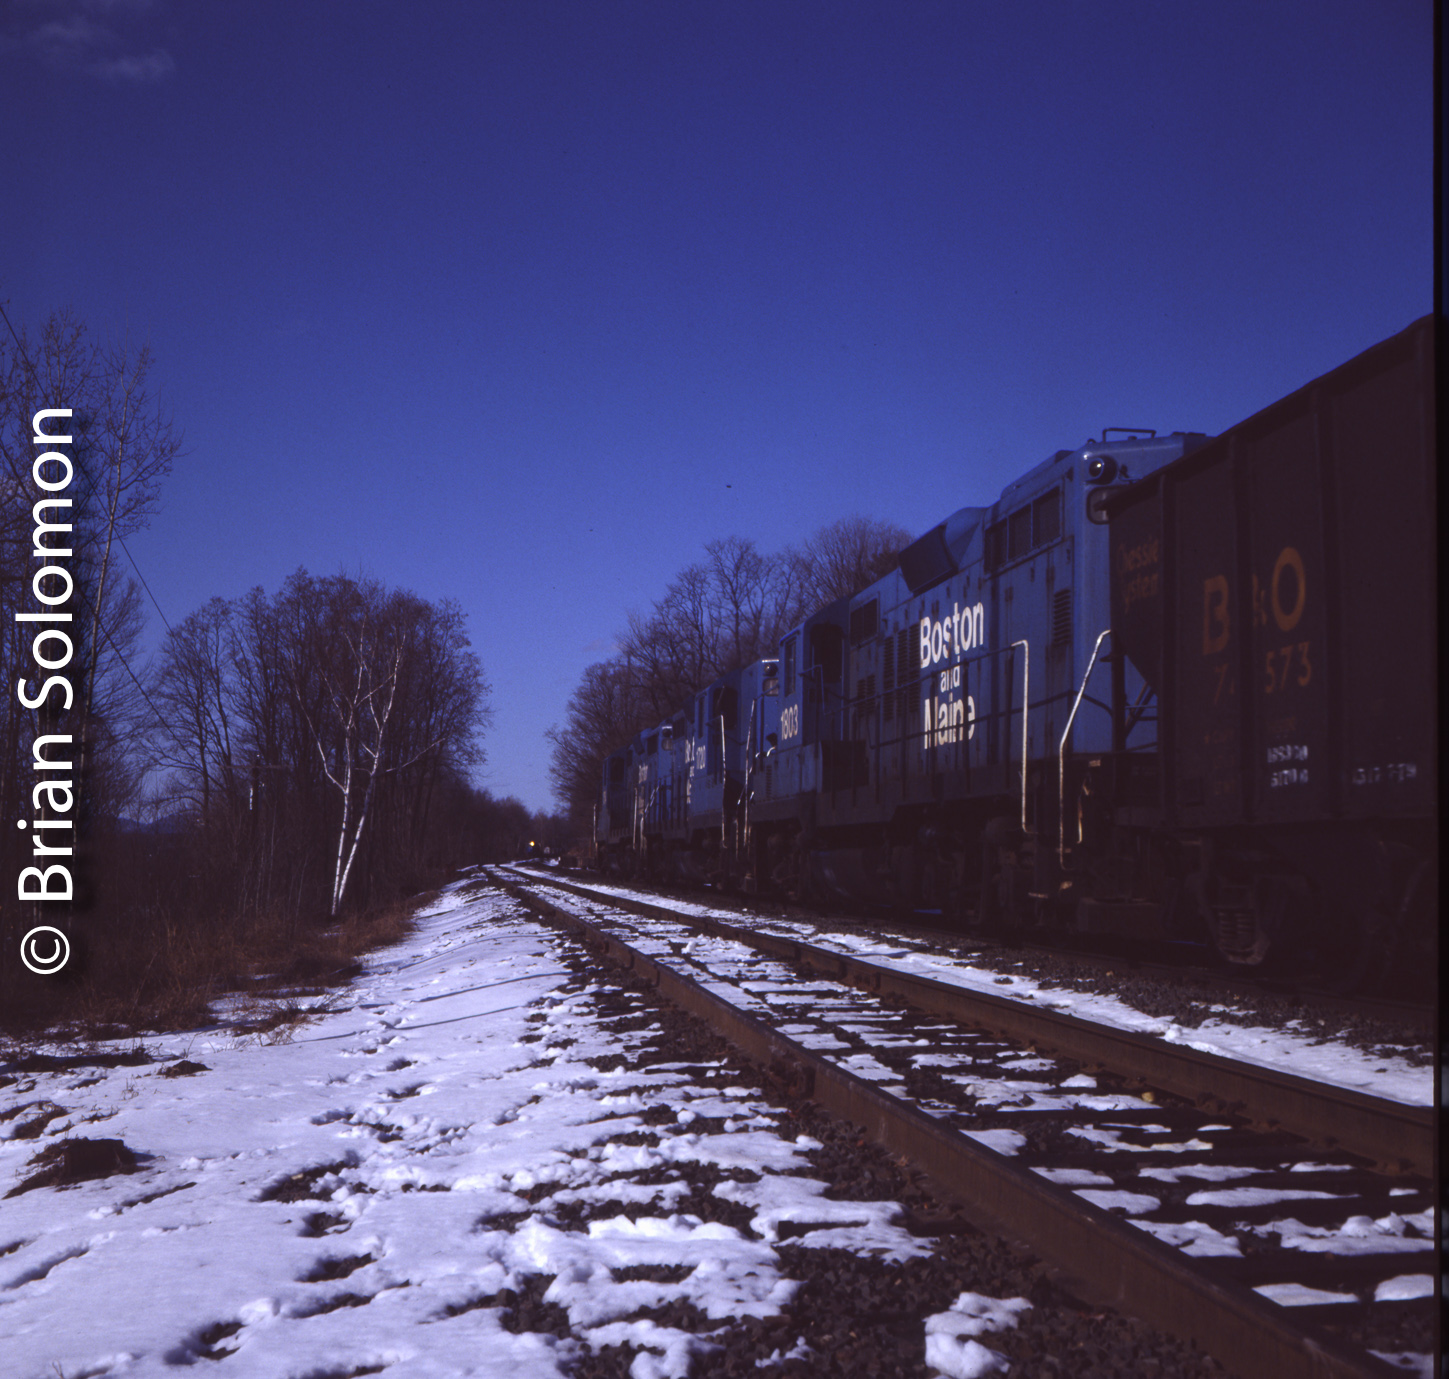
Scanning lightened the photos significantly, yet the results still demonstrate my failure to expose properly. To make for more pleasing images I needed to adjust exposure and contrast in post processing. However, it was important to scan the transparencies in such a way as to capture as much information as possible.
I was disappointed with my results and left the uncut film in the box that it was returned to me from the lab. I left them there for 33 years and only rediscovered them a few weeks ago. (Try that with your digital photos. No actually, don’t try that!).
With the technology now at hand I decided to see what I could do to make these photos presentable despite serious underexposure (suffering from receiving insufficient light for ideal exposure).
Working with an Epson V750 flatbed scanner, I scanned the transparencies (positive color film) using VueScan 9×64 (version 9.5.91) software.
Scanning, like photography, is an art and I’ve found to make the most effective scans often requires a bit of knowledge and skill.
I’ve worked with both the Epson and VueScan software, and while both produce excellent results, for this effort I chose VueScan because it allowed me greater control of the scanning process.
To extract more information from these difficult photos, I opted to make multi-pass scans, which do a better job of capturing detail in highlights and shadows. The software combines the data in the final file.

This is a screen shot of the VueScan work window. Notice the histogram at the left. This shows the distribution of data in the image relative to highlights, middle areas and shadows. The graph thus indicates that too much of the data is toward the shadow end, thus the unfortunate effect of gross underexposure.
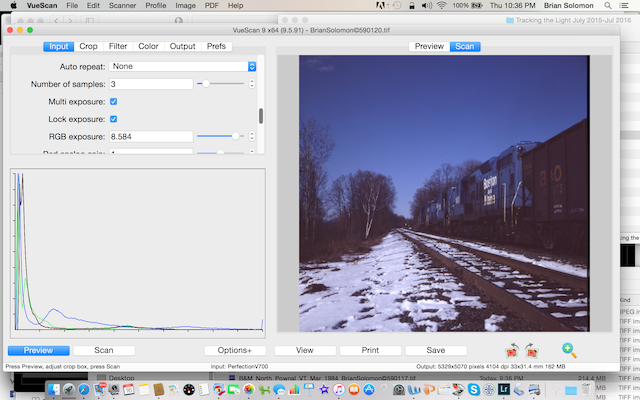
This is the input control window. Notice that I’ve selected to make a ‘multi exposure’ scan with three samples. This gathers greater amounts of information from the image than a single pass scan. While not necessarily immediately evident to the naked eye, this provides a base with which to adjust the photograph in post processing. In other words, I’ll lighten the image after scanning, but want to retain as much detail as possible.
Once scanned, I then imported the Tif files into Lightroom for post processing adjustments. The photos presented here are scaled from the original tif files (which are far too large for internet presentation).
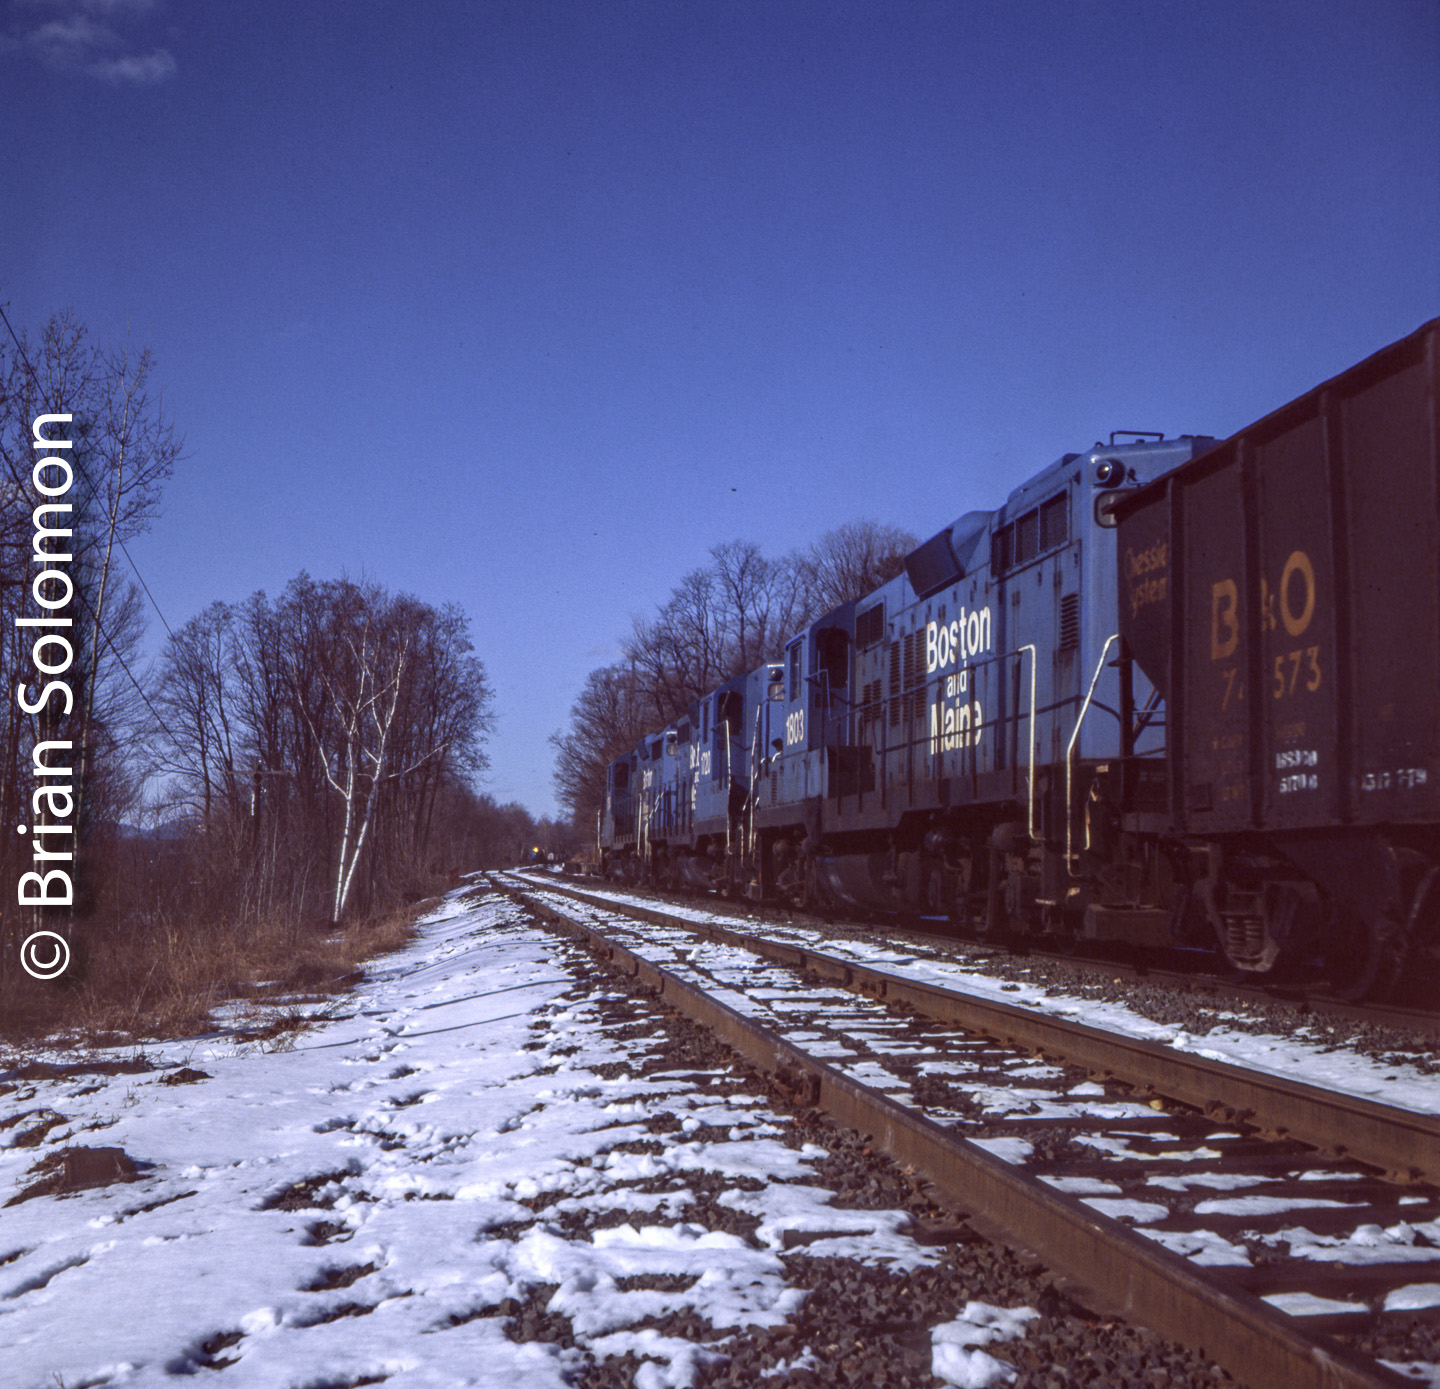
The results are not perfect, but vastly superior to the muddy, dense original chromes.
To allow you to better understand how I’ve set up the scanner with the VueScan software, I’ve included screen shots (above) of the sub-menus that show the various options and parameters I used.
There is more than one way to make a scan, and I’m sure if I continue to play with these chromes I may get an even better result. However, I have thousands of photographs that need scanning, and I’m limited to 24 hours a day.
http://briansolomon.com/trackingthelight/2017/12/04/boston-working-with-some-underexposed-photos/