VueScan Newsletter - June 2018
Hello and welcome to our latest newsletter. Thank you once again for your emails – all of your comments are appreciated by us and we are doing our best to implement your suggestions.
This month Cathi Nelson from APPO has her second article on photo scanning – which is photo organization methods. Many of you have said how useful last month’s article was, so thank you for letting us know and I have passed your messages on to Cathi.
As always, please continue to email me with your suggestions and comments.
Thank you!
Newsletter Subscriptions
If you have changed your email address and want to add the new address please sign up at: https://www.hamrick.com/newsletter.html
To unsubscribe – please go to: https://www.hamrick.com/unsubscribe.html
To access all previous newsletters: https://www.hamrick.com/about-vuescan.html#newsletter
VueScan Updates
Since the last newsletter, we’ve released VueScan 9.6.08 and 9.6.09.
What's new in version 9.6.08
- Fixed problem with Canon MX520
- Fixed problem with some eSCL (AirPrint/Scan) scanners
- Fixed problem with HP Scanjet Pro 2500 f1
- Fixed problem with PIE PowerSlide X
- Fixed miscellaneous small problems
What's new in version 9.6.09
- Added support for some Fujitsu document scanners
- fi-7030
- fi-7600
- fi-7700
- fi-7700S
- Added document feeder support for some Brother MFPs
- MFC-L2710DN
- MFC-L2710DW
- MFC-L2730DN
- MFC-L2730DW
- MFC-L2770DW
- Fixed Windows driver for some older Canon MFPs
- MP5
- MP10
- MP360
- MP370
- MP375R
- MP390
- MP700
- MP710
- MP740
- Fixed problem with some HP MFPs scanning incomplete pages
Update Notice for Updates
In the last newsletter, we announced that we no longer automatically display the ‘HELP | ABOUT’ window allowing you to update, as many people had requested to update in their own time.
However, following on from your comments – we have reinstated on the Splash Screen that a new version is now available. So, you can now see if a new version is available, and you can choose whether you want to download it or not.
To update to the latest version of VueScan, use the 'Help | Update' command, where you can install VueScan updates.
To read the release notes for all previous versions, go to: https://www.hamrick.com/vuescan/vuescan.htm#changes
Remember - we announce all our releases on Facebook – make sure you have ‘Liked’ us and ‘Share’ our post to all your friends and family.
https://www.facebook.com/VueScan/
Frequently Asked Questions
Q) “Is there a tradeoff between resolution and time saving for scanning negatives and slides?”
A) Scanning at about 2000 dpi is a good trade-off of time and resolution.
Q) “My particular stumbling block is color negative scanning. The colors come out wrong no matter what I do. I tried the demonstration version of SilverFast and the colors came out great, but if I could just use one program and save $300 that would be ideal. So a really in-depth review of this topic would be most appreciated.”
A) There are four techniques for getting great scans of color negatives. The first is to get the color balance correct. Setting “Color | Color balance” to “White balance” or “Auto levels” usually works well, but for unusual colors (like a sunset), click on a neutral (i.e. grey) color with the right mouse button to set the color balance. Double-click with the right mouse button to revert to “White balance”.
The second technique that is sometimes needed with some films is to either use the Generic film type or set the film base color. This is described in the VueScan User’s Guide in the “Advanced Workflow” section. https://www.hamrick.com/vuescan/html/vuesc16.htm#topic10
A third technique is to use the “Filter | Restore fading” option if the dyes in the color negative film have faded.
The fourth technique is experimenting with the “Color | Brightness” option.
Q) “One big problem I find is the absence of specific advice on a problem in scanning, for example, what can be done to improve scans of underexposed transparencies or transparencies with large underexposed areas.”
A) The main problem with underexposed transparencies is that the contrast is reduced. Try experimenting with the “Color | Brightness” option and/or the “Filter | Restore fading” option.
Q) “How do I scan my scrapbook? Full of photos, newspaper clippings and other information.”
A) Use the following procedure to scan a scrapbook:
1) Set “Input | Media” to “Color” or “Gray:
2) Set “Input | File type” to “JPEG”
3) Put a page of the scrapbook on the glass
4) Press the ‘Preview’ button
5) Crop a picture with the mouse
6) Press the ‘Save’ button
7) Repeat steps 5-6 for each additional picture
8) Go to step 3
Q) “How do I scan newsprint? The back side seems to show through.”
A) Use double-sided tape to tape a piece of black paper to the white lid of the scanner. This prevents the back side from showing through.
Q) “My scans from newspapers or magazines are made up of small dots. How do I fix this?”
A) Set the “Filter | Descreen” option.
All about Scanning Photos!
Cathi Nelson is the author of Photo Organizing Made Easy; Going from Overwhelmed to Overjoyed as well as the founder of the Association of Personal Photo Organizers.
Last month we covered: Hunt & Gather - Getting your photo collection into one place. This month is getting your photos organized.
Over to Cathi!
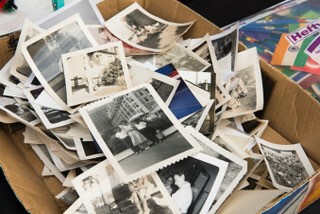
Since our last newsletter, I hope you have been able to locate your family photo collection and gathered them in one place. Were there any surprises? We often have a lot more photos than we initially expect and it can seem quite daunting to figure out the next steps. That is why I created a simple, easy to remember acronym, called the ABC’S of photo organizing. If you keep this in mind as you begin the process of sorting through all your photos, you will be well prepared for the 3rd step which is scanning. Following the ABC’S of photo organizing will save you time. You don't want to recreate the same mess you have digitally by scanning thousands of unorganized and unidentified photos.
I suggest finding four temporary containers and label them A, B, C and S (plastic storage bins or even cardboard boxes can work for this). Choose whichever works best for you but these are the categories I recommend.
A is for Album: These pictures are the best of the best! Ask yourself, does this photo belong in a photo album? Would you mourn the loss of the memories if you lost the photo? Would your great grandchildren enjoy this photo in the future? If yes, these are the photos that you’ll want to digitize, backup, share, and display. It doesn’t mean we’re going to put all these pictures into albums; it just means they are “album worthy.” As you come across A photos add them to your A containers or pile or make sure you identify them with a sticky note.
B is for Box: These photos are the extras that support your best. They are the ones you aren’t ready to part with and can’t decide if it is a true A photo. These photos will be archived for safekeeping but not necessarily digitized. Start adding these to your B container. I often joke, you can always leave a note in your B Box and tell whoever opens it in the future to feel free to toss the photos because you just couldn’t.

C is for Can: Yes, you CAN repurpose these pictures or throw them in the trash can! Your collection is filled with doubles, triples, and REALLY BAD photos. If your photo doesn’t fall into one of the previous categories, then it’s a C photo. We encourage you to be brutal here and set a goal to fill a garbage can with these!
Photo Organizer Tip: Photos to Discard
I suggest you eliminate many of your scenery, sunsets, and famous travel sites. If you traveled to the Grand Canyon, you likely have hundreds of photos. Try and narrow down to your favorite two or three because the Grand Canyon will still be there years from now, but the photos of people won’t be. In fact, my rule is to eliminate 80% of your photos and keep your favorite 20%! That means keep only 20 out of every 100.
S is for Story: Does the photo tell a story? These pictures play a significant role because there is something illustrative about the picture even though it may not be obvious. A picture of a single tree in the backyard may seem meaningless unless it’s the full-grown sapling your Great Grandfather had planted before he passed away. Or does the photo of your Dad making a silly face remind you of how he embarrassed you as a teen, but today you would give anything to see that smile again? Those are the S photos, the gems within your collection, the photos that matter and tell a story. Depending on what works best for you, you can either put these in a special container to review later or take the time immediately to write down the story on either the index card or sticky note you collected before beginning. If you use the Who, What, Where, When, and Why of basic journaling, your will capture all the necessary information and can add this when scanning.
Organizing by Date or Theme
If you are starting to feel overwhelmed because your photos are not in date order, don’t despair. I like to say; we take photos chronologically but we live and remember thematically. Think about how you’d like to view your family photos over the course of many years. There is no “rule” that photos have to be organized by time and date. You can also organize by themes. Did you always take photos of birthdays and holidays? How about organizing under the theme, We Loved to Celebrate. It won’t matter if the photos are from Christmas 1978 or 2015 when you are documenting the holidays you loved to share as a family. Common themes are: We Love to Travel or Vacation, We Love Sports, We Love Each Other, We Love Our Pets.
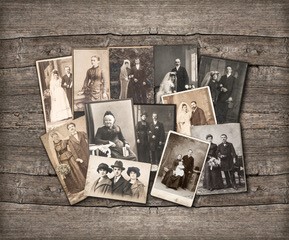
Store Printed Photos Safely
My final tip is to make sure you store your photos safely, which means they should be stored in archival containers and located in rooms with average temperatures and low humidity. Avoid basements and attic. Printed photos (and memorabilia) should be stored in containers designed for archiving. To be considered archival, products must meet rigorous standards developed by the Image Permanence Institute. This is achieved by passing the Photographic Activity Test (PAT). The PAT test is the international standard for photographic archival storage, and you can learn more about it at the Image Permanence Institute website. You can find archival safe photo boxes by searching online. The Association of Personal Photo Organizers designed their box, but it is available only in the USA.
In next months’ newsletter, I will share best practices and workflows for scanning your photo collection.
Bio
Cathi fell in love with photography in high school as the photo editor of her school yearbook. She soon found herself working two jobs to save up to buy her first professional camera. From that day on, Cathi became the photo historian of her family and friends. In 2007, Cathi noticed a change as consumers shifted to digital photography. Not only was she helping people with their printed photos, but their growing, digital collections as well. Recognizing that this problem was only going to accelerate, she founded the Association of Personal Photo Organizers and essentially started an entirely new profession. The Photo Organizers are small business owners who share a passion for telling people’s stories with photographs, videos, and memorabilia.
Cathi is the author of Photo Organizing Made Easy: Going from Overwhelmed to Overjoyed and is on the board of The Imaging Alliance and Fotobridge. She is a featured speaker across the globe, promoting the industry and educating the public about personal photo organizing and the revolution it’s created in the preservation of family histories.
Meanwhile, the people at VueScan and myself would love to see photos of your collection, post them on the VueScan Facebook page with any questions!

Customer Comment
Just an example of the many emails we receive (Thank you SO much). This one from a customer in Delaware, USA.
Hi Beverley,
I wanted to say thanks for sending out the newsletter.
I normally don’t look at the Newsletter, but I really depend on VueScan. I can always rely on getting my scanner to operate on most any operating system, even though the software that came with my scanner stopped working a long time ago…
I saw the newsletter, and thought “I wonder about slide scanning… I wonder if they support slide scanners (duh…)”. I looked in the current Newsletter, and saw you had questions/answers about the subject (resolutions…). Now I will really pay attention when it comes in my Inbox.
I am looking forward to Cathi’s articles in the coming months. Most of us have old slide/negative collections, and I want to buy a film scanner to bring them into my digital world (Lightroom).
Thanks so much for VueScan producing such a much needed and fine product.
</div> </div>